Showing posts with label crochet pattern. Show all posts

Monday, September 26, 2016

Jumbo Donut Pillow Crochet Pattern


Jumbo Donut Pillow:
-          Hook Size: I/9-5.50MM
-          Yarn Used: Red Heart 100% Acrylic Yarn
·         First Half (Icing):
1.      Chain 36, turn, sc in each st, beginning with second chain from hook (35)
§  sl st in first st to join, (use hdc for rest of project)
2.      Row 1: hdc in each st around (35)
3.      Row 2: hdc x4, inc, repeat (42)
4.      Row 3: hdc x2, inc, repeat (56)
5.      Row 4: hdc x3, inc, repeat (70)
6.      Row 5: hdc, inc, repeat (105)
7.      Row 6: hdc in each st (105)
8.      Row 7: hdc x6, inc, repeat (120)
9.      Row 8: hdc in each st (120)
10.  Row 9: hdc x11, inc, repeat (130)
11.  Row 10: hdc in each st (130)
12.  Row 11: hdc x12, inc, repeat (140)
13.  Row 12: hdc x13, inc, repeat (150)
14.  Row 13-15: hdc in each st (150)
§  Pull loop out so your work will not unravel. Do not cut.
15.  Sprinkles: Add lines or small chains of various colors to pillow at random, tying triple knots on back side to secure each sprinkle.
16.  Begin second half.
·         Second Half (Donut Base):
1.      Sl st second color yarn to center ring (wrong side face up) next to the little tail left from the initial foundation chain of the first ring.
2.      Tie a knot with the little tails from each color yarn and begin.
3.      Row 1: sc in each st around (35)
4.      Row 2-4: hdc in each st around (35)
5.      From here, repeat steps from first side of donut (beginning with Row 2) to complete second half.
6.      After completing your second half, sl st into next st, pull up a long loop, cut yarn and pull through to f/o. This creates a slip knot to secure your work.
·         Continuing Icing to join both halves:
1.      Joining: Hdc into each pair of stitches (one from each side/color) to join.
§  Add stuffing every 25 stitches.
2.      Wobbly Icing Edge (optional): Use any combination of sc, hdc, dc, & tc in each st along the edge, adding increases every few stitches as well.
§  The pattern I used was any stitch in the next 3 st, inc in 4th st using a random pairing of stitches (such as dc & tc), repeat).
3.      Sl st to fasten off, cut and pull yarn through pillow to hide tail.

Monday, February 8, 2016

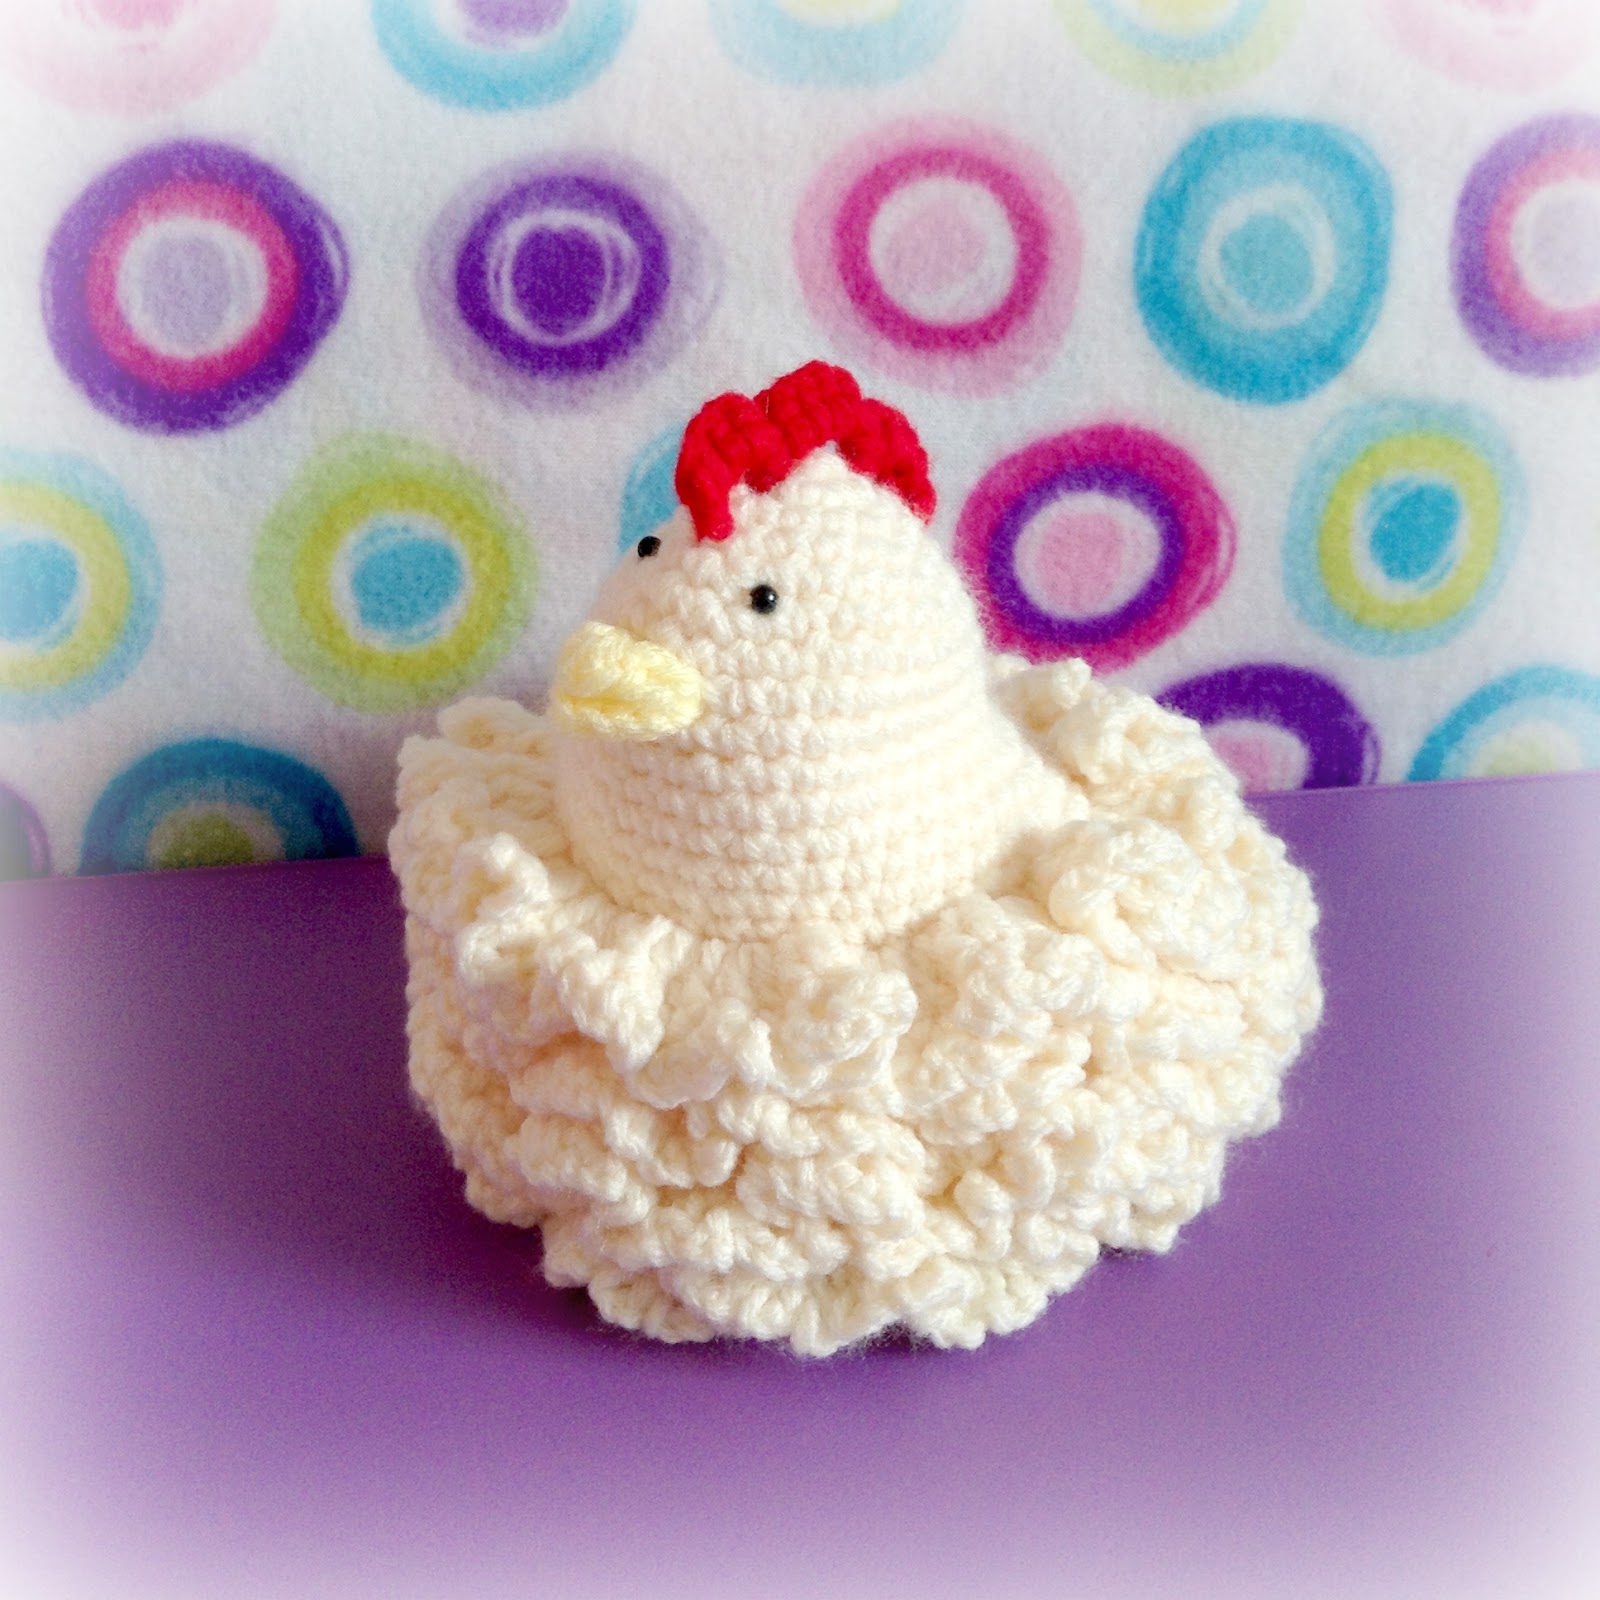
Fancy Russian Easter Chicken Crochet Pattern (translated)


~ RUSSIAN EASTER CHICKEN ~
BASE:
·         BEGINNING
1.      Chain 5
2.      In 2nd chain from hook, sc into next 3 ch
3.      In 4th ch, sc x3
4.      Round the corner so you are working in the bottom of your chain, sc in next 2 ch
5.      sc x2 in next last ch
6.      ROW TOTAL = 10

·         ROW 1
1.      Sc in next 3 st
2.      2 sc in next st
3.      3 sc in next st
4.      Sc in next 3 st
5.      2 sc in next st
6.      3 sc in next st
7.      ROW TOTAL = 16

·         ROW 2
1.      Sc in next 5 st
2.      2 sc in next 3 st
3.      Sc in next 5 st
4.      2 sc in next 3 st
5.      ROW TOTAL = 22

·         ROW 3
1.      Sc in next 5 st
2.      2 sc in next st
3.      Sc in next st
4.      2 sc in next st
5.      Sc in next st
6.      2 sc in next st
7.      Sc in next 6 st
8.      2 sc in next st
9.      Sc in next st
10.  2 sc in next st
11.  Sc in next st
12.  2 sc in next st
13.  Sc in next st
14.  ROW TOTAL = 28

·         ROW 4
1.      Sc in next 6 st
2.      2 sc in next st
3.      Sc in next 2 st
4.      2 sc in next st
5.      Sc in next 2 st
6.      2 sc in next st
7.      Sc in next 7 st
8.      2 sc in next st
9.      Sc in next 2 st
10.  2 sc in next st
11.  Sc in next 2 st
12.  2 sc in next st
13.  Sc in next st
14.  ROW TOTAL = 34

·         ROW 5
1.      Sc in next 7 st
2.      2 sc in next st
3.      Sc in next 3 st
4.      2 sc in next st
5.      Sc in next 3 st
6.      2 sc in next st
7.      Sc in next 8 st
8.      2 sc in next st
9.      Sc in next 3 st
10.  2 sc in next st
11.  Sc in next 3 st
12.  2 sc in next st
13.  Sc in next st
14.  ROW TOTAL = 40

·         ROW 6
1.      Sc in next 7 st
2.      2 sc in next st
3.      Sc in next 4 st
4.      2 sc in next st
5.      Sc in next 4 st
6.      2 sc in next st
7.      Sc in next 9 st
8.      2 sc in next st
9.      Sc in next 4 st
10.  2 sc in next st
11.  Sc in next 4 st
12.  2 sc in next st
13.  Sc in next 2 st
14.  ROW TOTAL = 46

·         ROW 7
1.      Sc in next 10 st
2.      2 sc in next st
3.      Sc in next 6 st
4.      2 sc in next st
5.      Sc in next 15 st
6.      2 sc in next st
7.      Sc in next 6 st
8.      2 sc in next st
9.      Sc in next 5 st
10.  Cut yarn & pull tail through last st
11.  ROW TOTAL = 50

HEAD/BODY:
·         BEGINNING
1.      Mr 6 (row 1)
2.      inc 12 (row 2)
3.      TOTAL = 12

·         ROW 3
1.      Sc in next 2 st
2.      2 sc in next st
3.      Repeat 3x
4.      ROW TOTAL = 16

·         ROW 4
1.      Sc in next 3 st
2.      2 sc in next st
3.      Repeat 3x
4.      ROW TOTAL = 20

·         ROW 5
1.      Sc in next 4 st
2.      2 sc in next st
3.      Repeat 3x
4.      ROW TOTAL = 24

·         ROW 6
1.      Sc in next 5 st
2.      2 sc in next st
3.      Repeat 3x
4.      ROW TOTAL = 28

·         ROW 7-9
1.      Sc in each st around (3x 28st)
2.      STITCH TOTAL = 84

·         ROW 10
1.      2 sc in next 3 st
2.      Sc in next 22 st
3.      2 sc in next 3 st
4.      ROW TOTAL = 34

·         ROW 11
1.      Sc in each st around
2.      STITCH TOTAL = 34

·         ROW 12
1.      2 sc in next st
2.      Sc in next st
3.      2 sc in next st
4.      Sc in next st
5.      2 sc in next st
6.      Sc in next 23 st
7.      2 sc in next st
8.      Sc in next st
9.      2 sc in next st
10.  Sc in next st
11.  2 sc in next st
12.  Sc in next st
13.  ROW TOTAL = 40

·         ROW 13
1.      Sc in each st around
2.      STITCH TOTAL = 40

·         ROW 14
1.      2 sc in next st
2.      Sc in next 2 st
3.      2 sc in next st
4.      Sc in next 2 st
5.      2 sc in next st
6.      Sc in next 26 st
7.      2 sc in next st
8.      Sc in next 2 st
9.      2 sc in next st
10.  Sc in next 2 st
11.  2 sc in next st
12.  ROW TOTAL = 46

·         ROW 15
1.      Sc in each st around
2.      STITCH TOTAL = 46

·         ROW 16 (BLO = back loop only)
1.      2 sc in next st
2.      Sc in next 3 st
3.      2 sc in next st
4.      Sc in next 36 st
5.      2 sc in next st
6.      Sc in next 3 st
7.      2 sc in next st
8.      ROW TOTAL = 50

·         ROW 17-18
1.      Sc in each st around (2x 50st)
2.      STITCH TOTAL = 100

·         ROW 19 (BLO)
·         Sc in each st around (1x 50st)
·         STITCH TOTAL = 50

·         ROW 20-21
1.      Sc in each st around (2x 50st)
2.      STITCH TOTAL = 100

·         ROW 22 (BLO)
1.      Sc in each st around (1x 50st)
2.      STITCH TOTAL = 50

·         ROW 23-24
1.      Sc in each st around (2x 50st)
2.      STITCH TOTAL = 100

·         ROW 25 (BLO)
1.      Sc in each st around (1x 50st)
2.      STITCH TOTAL = 50

·         ADDING BASE TO BODY
1.      Fold chicken body in half to find center
2.      Match up center of base to body as closely as possible
3.      Sc body to base adding stuffing every so often until closed

RUFFLES:
1.      Sl st into last st of previous row
2.      Turn chicken upside down
3.      Chain 3 (will count as first dc)
4.      Dc into same st
5.      2x dc in each st around
6.      Sl st into beginning chain 3 st
7.      ROW TOTAL = 100
8.      Chain 3
9.      Sc into next st
10.  Repeat in each st around (all 100 st)
11.  Sl st into beginning st
12.  If continuing ruffles with same color yarn, sl st down chain 3 (3 sl st total)
13.  Sl st up to next blo row (2 sl st total)
14.  Repeat steps 1-12 for next 2 ruffle rows
15.  Complete steps 1-11 on final ruffle row, f/o & weave in tail

BEAK:
1.      Mr 6
2.      In next st: sc, dc, sc
3.      Sl st in next 2 st
4.      In next st: sc, dc, sc
5.      Sl st in next 2 st
6.      STITCH TOTAL = 10
7.      f/o, fold in half, & sew to face

COMB + EYES:
1.      sl st into (center-back) 4th row (head)
2.      chain 3
3.      sc into 2nd row (back)
4.      chain 4
5.      sc into 2nd row (front) – (over mr)
6.      chain 3
7.      sc into 4th row (center-front)
8.      turn
9.      sl st under front comb-loop
10.  sc x3 around comb
11.  sl st in same comb-loop
12.  sl st under middle comb-loop
13.  sc x4 around comb
14.  sl st in same comb-loop
15.  sl st under back comb-loop
16.  sc x3 around comb
17.  sl st in same comb-loop
18.  sl st into same (center-back) 4th row space you began in
19.  f/o, tie tails together, pull through & hide in body
20.  Use small round beads for eyes & sew to face
21.  RUSSIAN EASTER CHICKEN COMPLETE!

 Original pattern courtesy of Natali Korneeva. Translation by Bethany Rainbolt.
Part 1:

Part2: